产品购买地址
目前我还没看到比云筏NAT系列机器性价比高的其他商家产品,购买地址:https://www.cloudraft.cn/cart.php?gid=20
要装Windows最好选内存4G的那款,50一个月可以说相当便宜了。
SSH连接服务器
对于本地没有IPv6的人来说,这个NAT服务器还需要一些额外配置才能和普通的IPv4服务器一样使用
获取服务器的基础信息
在控制面板中,查看右侧区域的IP信息,将鼠标移动到内网IP上即可查看到内网IPv4和公网IPv6地址。这里我们要记录下内网IPv4的地址,本例中为172.17.200.10。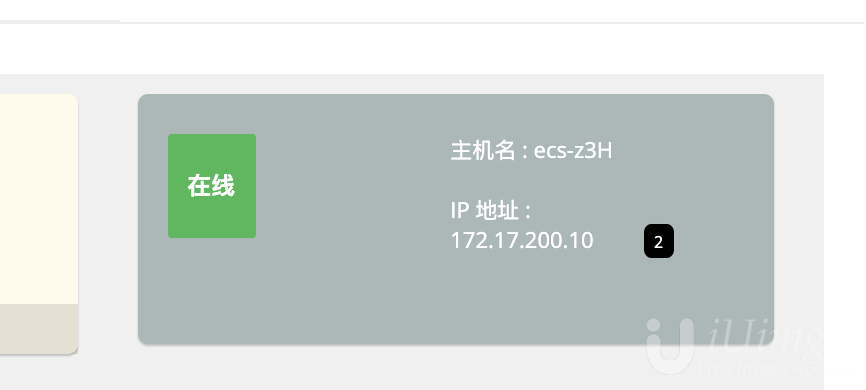
然后进行IPv4端口转发的的公网IP是可能发生变动的,因此以公告(点此查看)为准,本例中是:virt-nat-eu-1.cloudraft.cn
计算端口号
每台机器分配5个端口,端口序号(后面说的B)从1~5分别对应22、80、443、10001、10002。可以根据自己服务器的内网IPv4计算出端口,端口格式:1AAAB,其中1为固定数字,AAA为服务器内网IPv4的第四段(D段)前位补零,B为上述端口序号1~5。例如服务器内网IPv4为172.17.200.2,则AAA为002,22号端口映射的公网端口为10021,80端口为10022,以此类推。
另附云筏KvmNat映射表_20200118,供查询映射规则:https://www.cloudraft.cn/dl.php?type=d&id=2
本例中因为是172.17.200.10,所以端口号是10101~10105; SSH端口为10101。
测试连接
Jasons-MacBook-Pro:~ Jason$ ssh [email protected] -p 10101

The authenticity of host \\\'[virt-nat-eu-1.cloudraft.cn]:10101 ([88.99.48.50]:10101)\\\' can\\\'t be established.

ECDSA key fingerprint is SHA256:tvIf426QM1bWb8yv0KeoejpUWUl8PEYw2Q4qUu6fuk4.

Are you sure you want to continue connecting (yes/no)? yes

Warning: Permanently added \\\'[virt-nat-eu-1.cloudraft.cn]:10101\\\' (ECDSA) to the list of known hosts.

Last login: Fri Jan 17 04:39:54 2020 from xxxxxxx

[root@ecs-z3H ~]#
没毛病,可以直接连接上去。进行下一步的工作。
VNC连接服务器
首先下载VNC客户端:https://www.realvnc.com/en/connect/download/viewer/
然后在控制面板中,查看VNC的信息,以及修改VNC密码(如果懒的看邮件的话)
我这边的机器信息如下:VNC IP 88.99.48.23;VNC Port 5901
因此使用RealVNC登录即可:
输入密码,成功连接。
装宝塔
首先先确保自己能连上SSH,参考前文。
一键脚本
使用官方的一键脚本没有任何问题:
yum install -y wget && wget -O install.sh http://download.bt.cn/install/install_6.0.sh && sh install.sh
按y继续:
 ----------------------------------------------------------------------

| Bt-WebPanel 7.0 FOR CentOS/Ubuntu/Debian

 ----------------------------------------------------------------------

| Copyright © 2015-2099 BT-SOFT(http://www.bt.cn) All rights reserved.

 ----------------------------------------------------------------------

| The WebPanel URL will be http://SERVER_IP:8888 when installed.

 ----------------------------------------------------------------------

Do you want to install Bt-Panel to the /www directory now?(y/n):
然后脚本全自动运行安装宝塔,全程大约1~5分钟,本例为2分钟。
Complete!

success

Stopping Bt-Tasks...	done

Stopping Bt-Panel...	done

Starting Bt-Panel...	done

Starting Bt-Tasks... 	done

==================================================================

Congratulations! Installed successfully!

==================================================================

Bt-Panel: http://[2a01:4f8:b16:1051::52:7586]:8888/57bd0bdf

username: y4otwn2w

password: 4f6d2d6d

Warning:

If you cannot access the panel,

release the following port (8888|888|80|443|20|21) in the security group

==================================================================

Time consumed: 2 Minute!
获取宝塔的登录信息
IPv6地址(直接可以访问):http://[2a01:4f8:b16:1051::52:7586]:8888/57bd0bdf
IPv4地址(需根据下面的操作设置):http://virt-nat-eu-1.cloudraft.cn:10104/57bd0bdf
username: y4otwn2w
password: 4f6d2d6d
修改宝塔IPv4访问端口
安装完成后执行bt,键入8,将宝塔监听的端口修改为10001。根据之前的端口计算方式,可以知道本例中的10001端口被映射为公网IP的10104端口,因此访问方式为:http://virt-nat-eu-1.cloudraft.cn:10104/
注意!修改完监听端口后,IPv6的端口也会变为10001
使用CloudFlare建IPv4 6站
注册CloudFlare
不多说了,直接注册:www.cloudflare.com ,然后如果有需要可以使用云筏提供的免费CloudFlarePartner:https://cf.cloudraft.cn
宝塔设置监听IPv6
面板设置监听IPv6即可: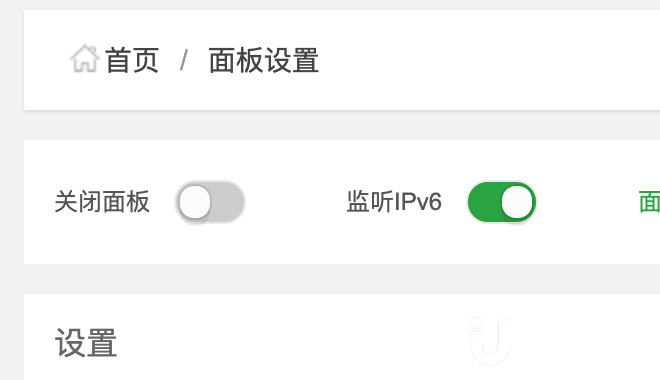
CloudFlare设置IPv6解析

等DNS生效了就好了,测试地址:https://cloudraft-nat-test.liujason.com/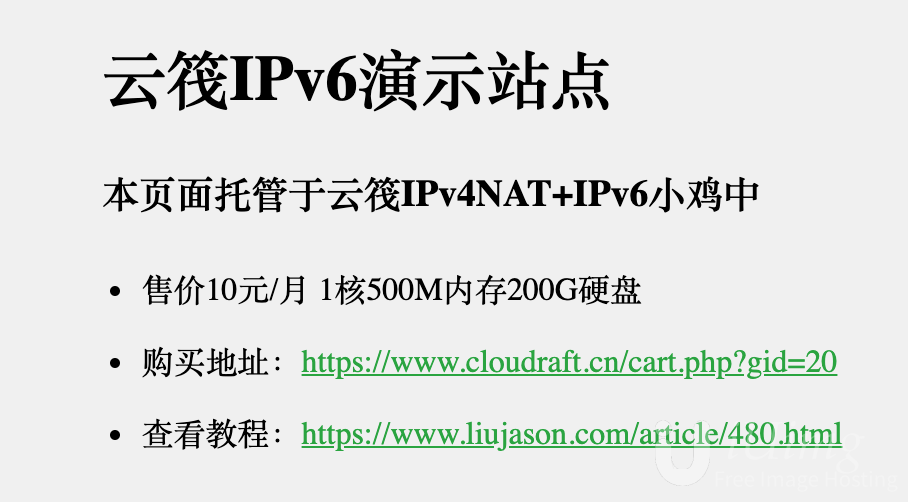
装Windows系统
挂载镜像
官方目前提供两个镜像,如果需要其他镜像可以购买这个服务(点击购买服务)一次性支付50元。
在控制面板中的VPS配置选项中,可以选择启动顺序和挂载磁盘: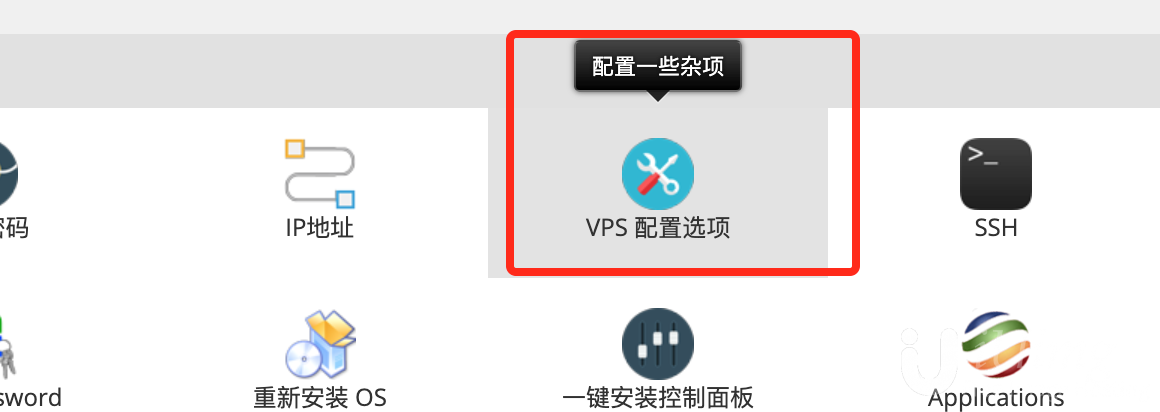
选择先CD再Disk,然后选择自己想要挂载的镜像,然后保存,重启服务器后即可生效。
记得在控制面板中重启服务器!
连接VNC进行安装
根据上面的VNC连接教程,连上机器的VNC,然后点击窗口上方的ctrl alt del按钮,在机器内软重启,在启动选项中根据提示操作,进入安装界面。
注意,云筏提供的两个镜像是添加了virtio驱动的,如果要提交工单使用其他镜像的话需要注意是否带有virtio驱动。
安装FileRun私有云盘实现跨客户端同步
1. 新建网站,下载安装包:https://filerun.com/download 并上传到网站根目录+解压
2. 新建数据库filerun,记录下密码
3. 支持的PHP版本为7.1~7.3,另外需要安装ionCube扩展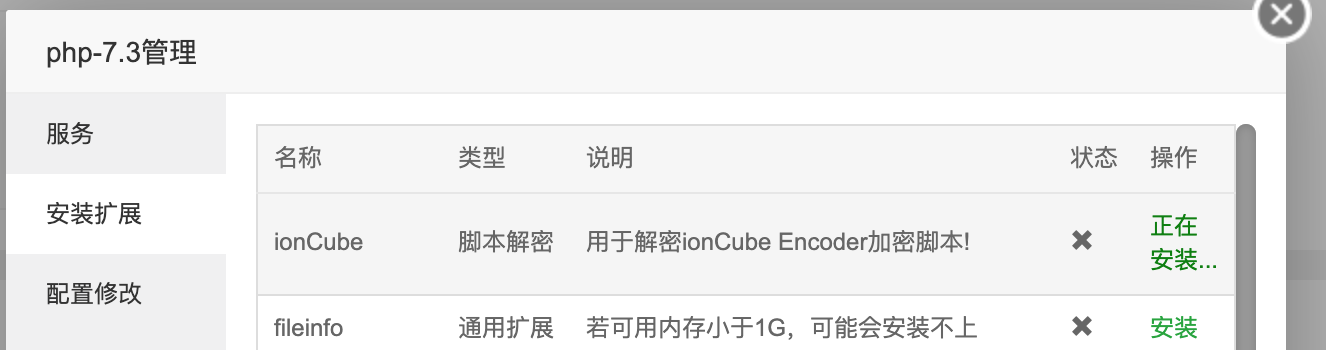
- 访问网站,自动跳转到安装引导页面,一路next,然后设置数据库的账号密码后,会获得filerun的初始账号密码
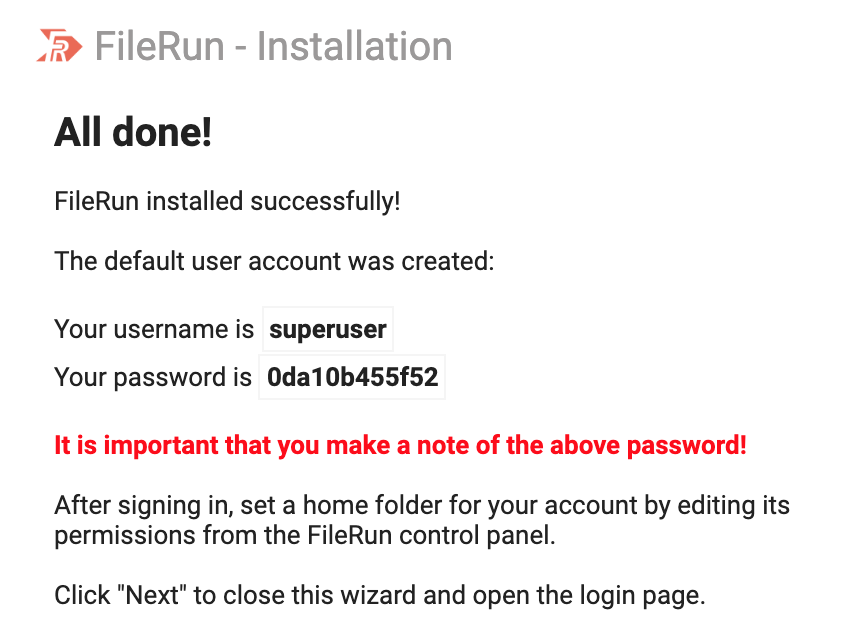
安装完成
安装Seafile私有云盘实现跨客户端同步
!!不推荐装Seafile,建议装FileRun,非常好用而且占用少。
Seafile 是一款开源的企业云盘,注重可靠性和性能。支持 Windows, Mac, Linux, iOS, Android 平台。支持文件同步或者直接挂载到本地访问。
安全性
Seafile 支持端到端的加密技术来保护你的数据安全,服务器端数据加密,所有的数据传输使用 HTTPS/TLS 协议。
Seafile 通过“资料库”来分类管理文件,每个资料库可单独同步,用户可「加密」资料库, 且密码不会保存在服务器端,所以即使是服务器管理员也无权?访问你的文件。
安装方法
下载一键脚本并安装:
wget https://raw.githubusercontent.com/haiwen/seafile-server-installer-cn/master/seafile-server-centos-7-amd64-http

yum install epel-release -y && yum update -y && bash seafile-server-centos-7-amd64-http 7.0.5
其中选择社区版本(CE)或者专业版(Pro),Pro版本免费支持3个用户,功能更多所以自用的话推荐Pro版本。这里我选CE做演示。
This script installs the community edition of the Seafile Server on a Centos 7 64bit
- Newest Seafile server version, MariaDB, Memcached, NGINX -
-----------------------------------------------------------------
This installer is meant to run on a freshly installed machine
only. If you run it on a production server things can and
probably will go terrible wrong and you will loose valuable
data!
For questions or suggestions please contact us at
[email protected]
Possible options:
1 = Seafile Community (Free) Edition (CE)
2 = Seafile Professional Edition (PRO)
- CE
- PRO
- ABORT
Which Seafile version would you like to install? 1
中间碰到一个报错,查了一下是pip安装的发生了冲突,删掉之后重新运行脚本即可:
#报错内容:

#Error unpacking rpm package python-urllib3-1.10-2.fc21.noarch

#error: unpacking of archive failed on file /usr/lib/python2.7/site-packages/urllib3/packages/ssl_match_hostname: cpio: rename

#解决方案(如果没有报错直接跳过):

pip uninstall urllib3
Your Seafile server is installed
-----------------------------------------------------------------
Server Address: http://127.0.0.1
Seafile Admin: [email protected]
Admin Password: Iengei8u
Seafile Data Dir: /opt/seafile/seafile-data
Seafile DB Credentials: Check /opt/seafile.my.cnf
Root DB Credentials: Check /root/.my.cnf
This report is also saved to /opt/seafile/aio_seafile-server.log
Next you should manually complete the following steps
- Log in to Seafile and configure your server domain via the system
admin area if applicable.
- If this server is behind a firewall, you need to ensure that
tcp port 80 is open.
- Seahub tries to send emails via the local server. Install and
configure Postfix for this to work or
check https://manual.seafile.com/config/sending_email.html
for instructions on how to use an existing email account via SMTP.
Optional steps
- Check seahub_settings.py and customize it to fit your needs. Consult
http://manual.seafile.com/config/seahub_settings_py.html for possible switches.
- Setup NGINX with official SSL certificate.
- Secure server with iptables based firewall. For instance: UFW or shorewall
- Harden system with port knocking, fail2ban, etc.
- Enable unattended installation of security updates. Check
https://wiki.Ubuntu.org/UnattendedUpgrades for details.
- Implement a backup routine for your Seafile server.
- Update NGINX worker processes to reflect the number of CPU cores.
Seafile support options
For free community support visit: https://bbs.seafile.com
For paid commercial support visit: https://seafile.com
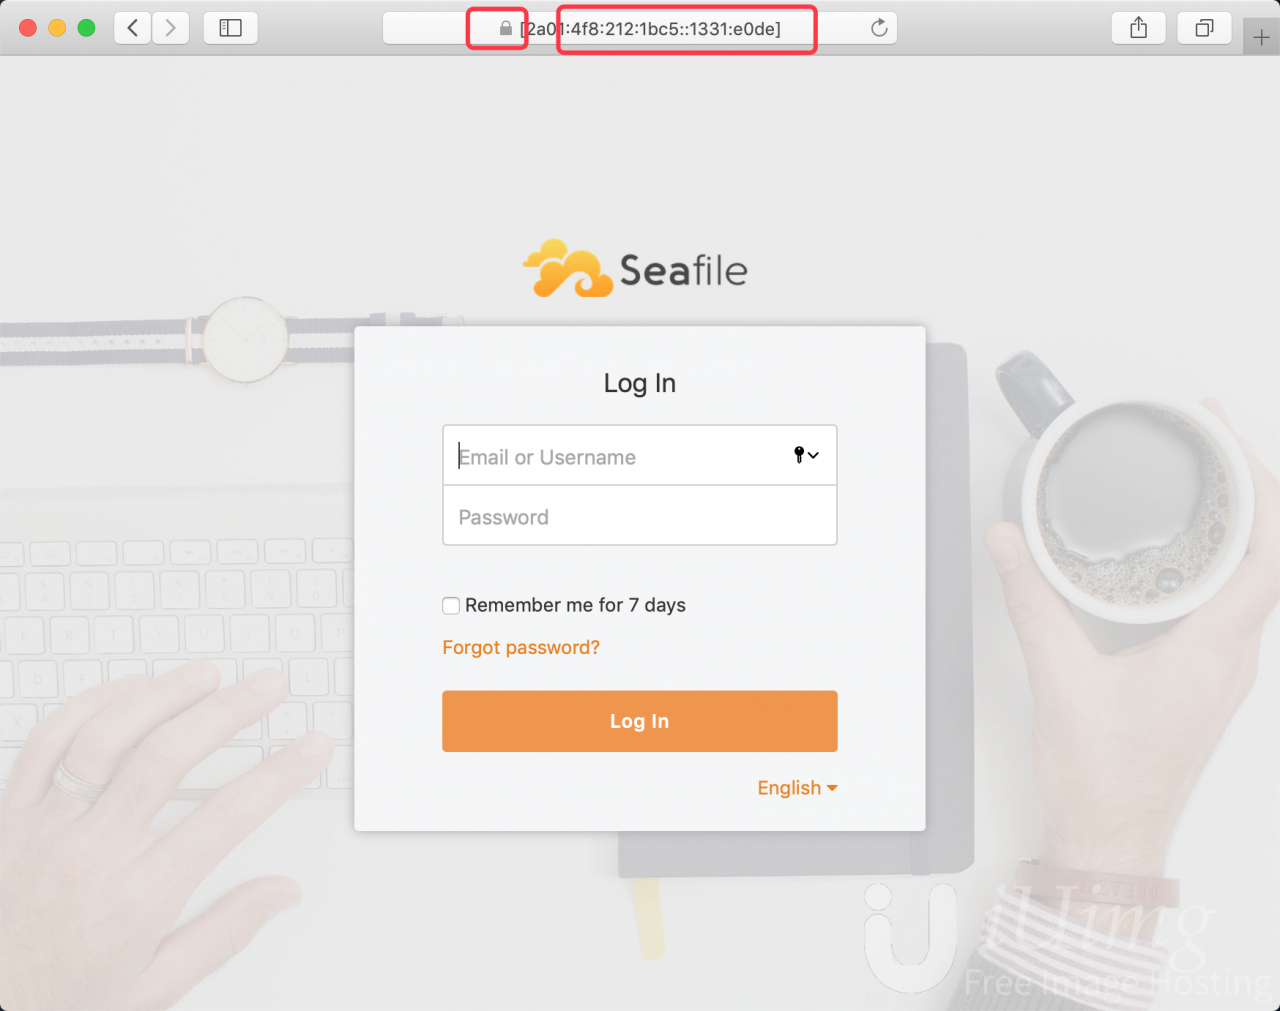
安装完成后可以看到对应的登录信息,使用IPv6即可登录。如果需要用IPv4则需要使用80端口映射的端口,本例中是10102。
http://virt-nat-eu-1.cloudraft.cn:10102
网络设置
如果需要使用IPv4的话,除了按上述说的使用80端口访问外,还需要进入设置页面填写正确的服务器对外的 SERVICE_URL 和 FILE_SERVER_ROOT,本例中填写的信息如下:
SERVICE_URL: http://virt-nat-eu-1.cloudraft.cn:10102
FILE_SERVER_ROOT: \\\'http://virt-nat-eu-1.cloudraft.cn:10102/seafhttp\\\'
开启Seafile监听IPv6
用lsof检查一下80端口的监听情况:
[root@drive ~]# lsof -i:80

COMMAND   PID  USER   FD   TYPE DEVICE SIZE/OFF NODE NAME

nginx   28258  root   12u  IPv4  37409      0t0  TCP *:http (LISTEN)

nginx   28259 nginx   12u  IPv4  37409      0t0  TCP *:http (LISTEN)

nginx   28260 nginx   12u  IPv4  37409      0t0  TCP *:http (LISTEN)
看来Seafile是通过nginx监听的服务,所以修改nginx的配置文件/etc/nginx/conf.d/seafile.conf 把server段里面增加IPv6监听,并添加自签名证书(可选,也可以只监听80端口,不用管证书):
server {

    listen 80;

    listen [::]:80;

    listen [::]:443 ssl;

    ssl_certificate /etc/nginx/drive.liujason.com.crt;

    ssl_certificate_key /etc/nginx/drive.liujason.com.key;

    server_name drive.liujason.com;
修改完成后添加证书到相应目录,然后service nginx restart重启nginx服务,再用lsof查看监听情况:
[root@drive conf.d]# service nginx restart

Redirecting to /bin/systemctl restart nginx.service

[root@drive conf.d]# lsof -i:443

COMMAND   PID  USER   FD   TYPE DEVICE SIZE/OFF NODE NAME

nginx   29197  root   14u  IPv6  41410      0t0  TCP *:https (LISTEN)

nginx   29198 nginx   14u  IPv6  41410      0t0  TCP *:https (LISTEN)

nginx   29199 nginx   14u  IPv6  41410      0t0  TCP *:https (LISTEN)

[root@drive conf.d]# lsof -i:80

COMMAND   PID  USER   FD   TYPE DEVICE SIZE/OFF NODE NAME

nginx   29197  root   12u  IPv4  41408      0t0  TCP *:http (LISTEN)

nginx   29197  root   13u  IPv6  41409      0t0  TCP *:http (LISTEN)

nginx   29198 nginx   12u  IPv4  41408      0t0  TCP *:http (LISTEN)

nginx   29198 nginx   13u  IPv6  41409      0t0  TCP *:http (LISTEN)

nginx   29199 nginx   12u  IPv4  41408      0t0  TCP *:http (LISTEN)

nginx   29199 nginx   13u  IPv6  41409      0t0  TCP *:http (LISTEN)
宝塔安装ImgURL图床
我就不重复了,官网都有宝塔安装的教程:点这里查看
然后结合上面的CF->IPv6即可完美使用,演示:https://img.liujason.com
1. 小图(800*530)
- 大图(4K)

宝塔安装Hellohao图床
!!注意:不推荐装hellohao图床,推荐装imgurl!!
其实如果只是装一个图床的话直接用他们的一键包就好了,但是如果是想和其他网站共存的话建议手动部署。因为安装好的宝塔还需要做演示用,因此就直接上手动安装的教程了,全新系统下一键脚本:
yum install -y wget && wget -O hellohao.sh http://www.hellohao.cn/gg/hellohao.sh && bash hellohao.sh
前提准备
- 安装好宝塔,设置好宝塔的端口映射。
- 在安全设置中放行10002端口。
- 在应用商店安装TomCat8(注意是8!),自带JDK1.8环境。
- 在应用商店安装MySQL,没有特殊版本要求,推荐5.5。
- 在系统目录/home下新建一个javaweb目录。
- 远程下载编译好的Hellohao软件包:https://github.com/Hello-hao/Tbed/releases/download/Hellohao%E5%9B%BE%E5%BA%8A/Hellohao2020-01-18.7z
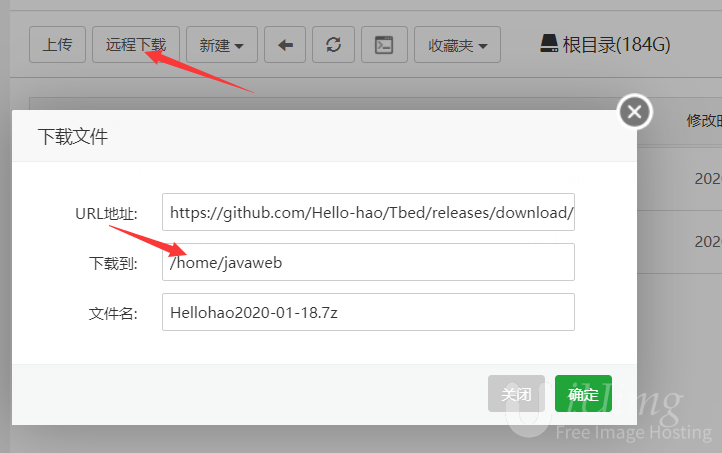
解压后得到Tbed.jar和application.properties两个文件,这两个文件就是我们需要的部署包,和配置文件了。
添加并导入数据库
宝塔中添加数据库picturebed,记录下数据库的账户密码。使用宝塔内置的功能导入picturebed.sql。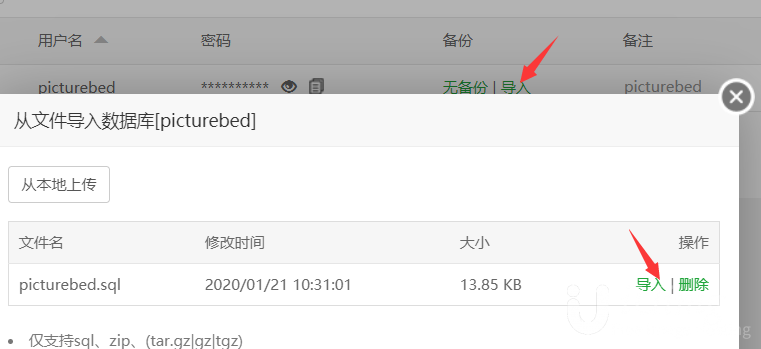
配置信息
用文本编辑器打开本地的application.properties,修改 MySQL密码和端口号10002
#数据库账号

spring.datasource.username=picturebed

#数据库密码

spring.datasource.password=自己设置的密码

#数据库链接地址

spring.datasource.url=jdbc:mysql://localhost:3306/picturebed?useUnicode=true&characterEncoding=utf8&serverTimezone=GMT%2B8

#端口

server.port=10002

#鉴黄周期表达式 下方表达式为每天七点半执行

#不懂请勿乱修改。具体可以参考官方文档http://doc.wwery.com

Expression=0 30 04 * * ?

#下边的配置项不需要修改。
mybatis.configuration.map-underscore-to-camel-case=true
mybatis.mapper-locations=classpath:mapper/*.xml
logging.level.cn.hellohao.dao=debug
spring.jackson.date-format=yyyy-MM-dd HH:mm:ss
spring.jackson.time-zone=GMT 8
spring.datasource.driver-class-name=com.mysql.jdbc.Driver
spring.datasource.type=com.alibaba.druid.pool.DruidDataSource
spring.thymeleaf.cache=false
multipart.maxFileSize=10240KB
multipart.maxRequestSize=10240KB
spring.thymeleaf.mode = LEGACYHTML5
spring.http.multipart.location=/data/upload_tmp
程序部署
把修改后的application.properties上传到服务器目录下:/home/javaweb,注意这要覆盖原有文件。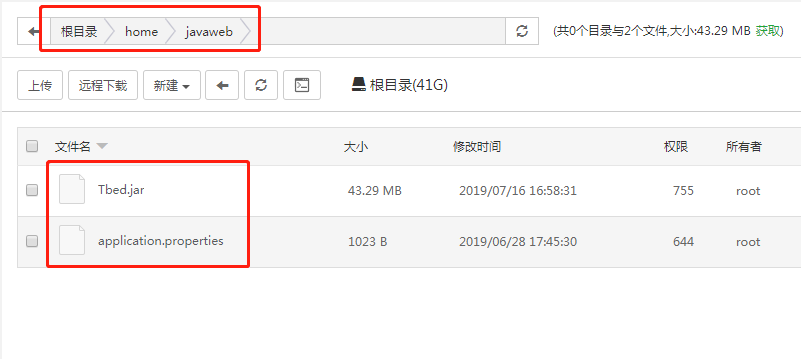
启动项目
在完成了上述步骤后,然后SSH连接你的服务器,执行以下命令:
cd /home/javaweb

yum install screen -y && screen java -jar Tbed.jar
等项目运行完毕即可,按Crtl a 然后按d让screen后台运行。
打开浏览器访问地址为:http://virt-nat-eu-1.cloudraft.cn:映射端口5 (本例中为http://virt-nat-eu-1.cloudraft.cn:10105), 用户名:admin, 密码:admin。
看见如下命令,则说明运行成功: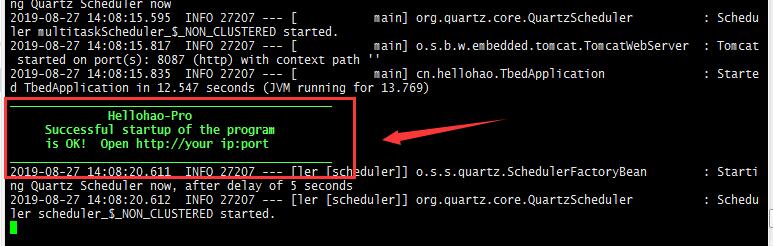
添加CF做CDN
简单说下思路:新建站点,无数据库,纯静态;设置SSL;设置反向代理,监听本地的10002端口。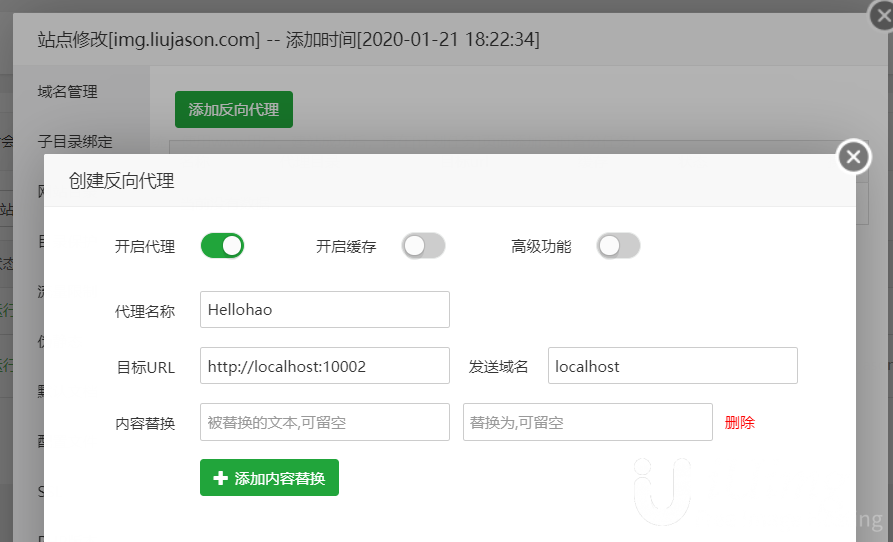
然后添加到CF上就可以了,演示:https://img.liujason.com![]()